
Latest Posts

How I keep Oregano From Falling Over

My oregano was getting too tall and was flopping over. I should have cut it back, but the bees seem to really love it! I still have a small stash of ribbon from my florist days, so I tied it up into a tower of oregano. Now I am happy, the other plants aren’t getting shaded out, and the bees are happy!

When is the Best Time to Put Down Crab Grass Preventer?

According to my horticulturist husband, the answer is…..”When the Forsythias are in bloom!”
Phenology is the study of recurring events in the life cycle of different species and learning how such events are interrelated throughout that species and other species.
Forsythias reach full bloom when soil temps get up to 55 degrees Fahrenheit. Coincidentally, Crab Grass seeds also germinate when the soil temps are at 55degrees Fahrenheit!
Therefore, those yellow flowers blooming on forsythia bushes as a phenological symbol, or nature signal, telling you, “Hey! It’s time to throw down some Crab Grass preventer!”


The above link is an affiliate link. Gardenshapers earns a commission on all purchases made from clicking this link. Thanks for supporting our site!
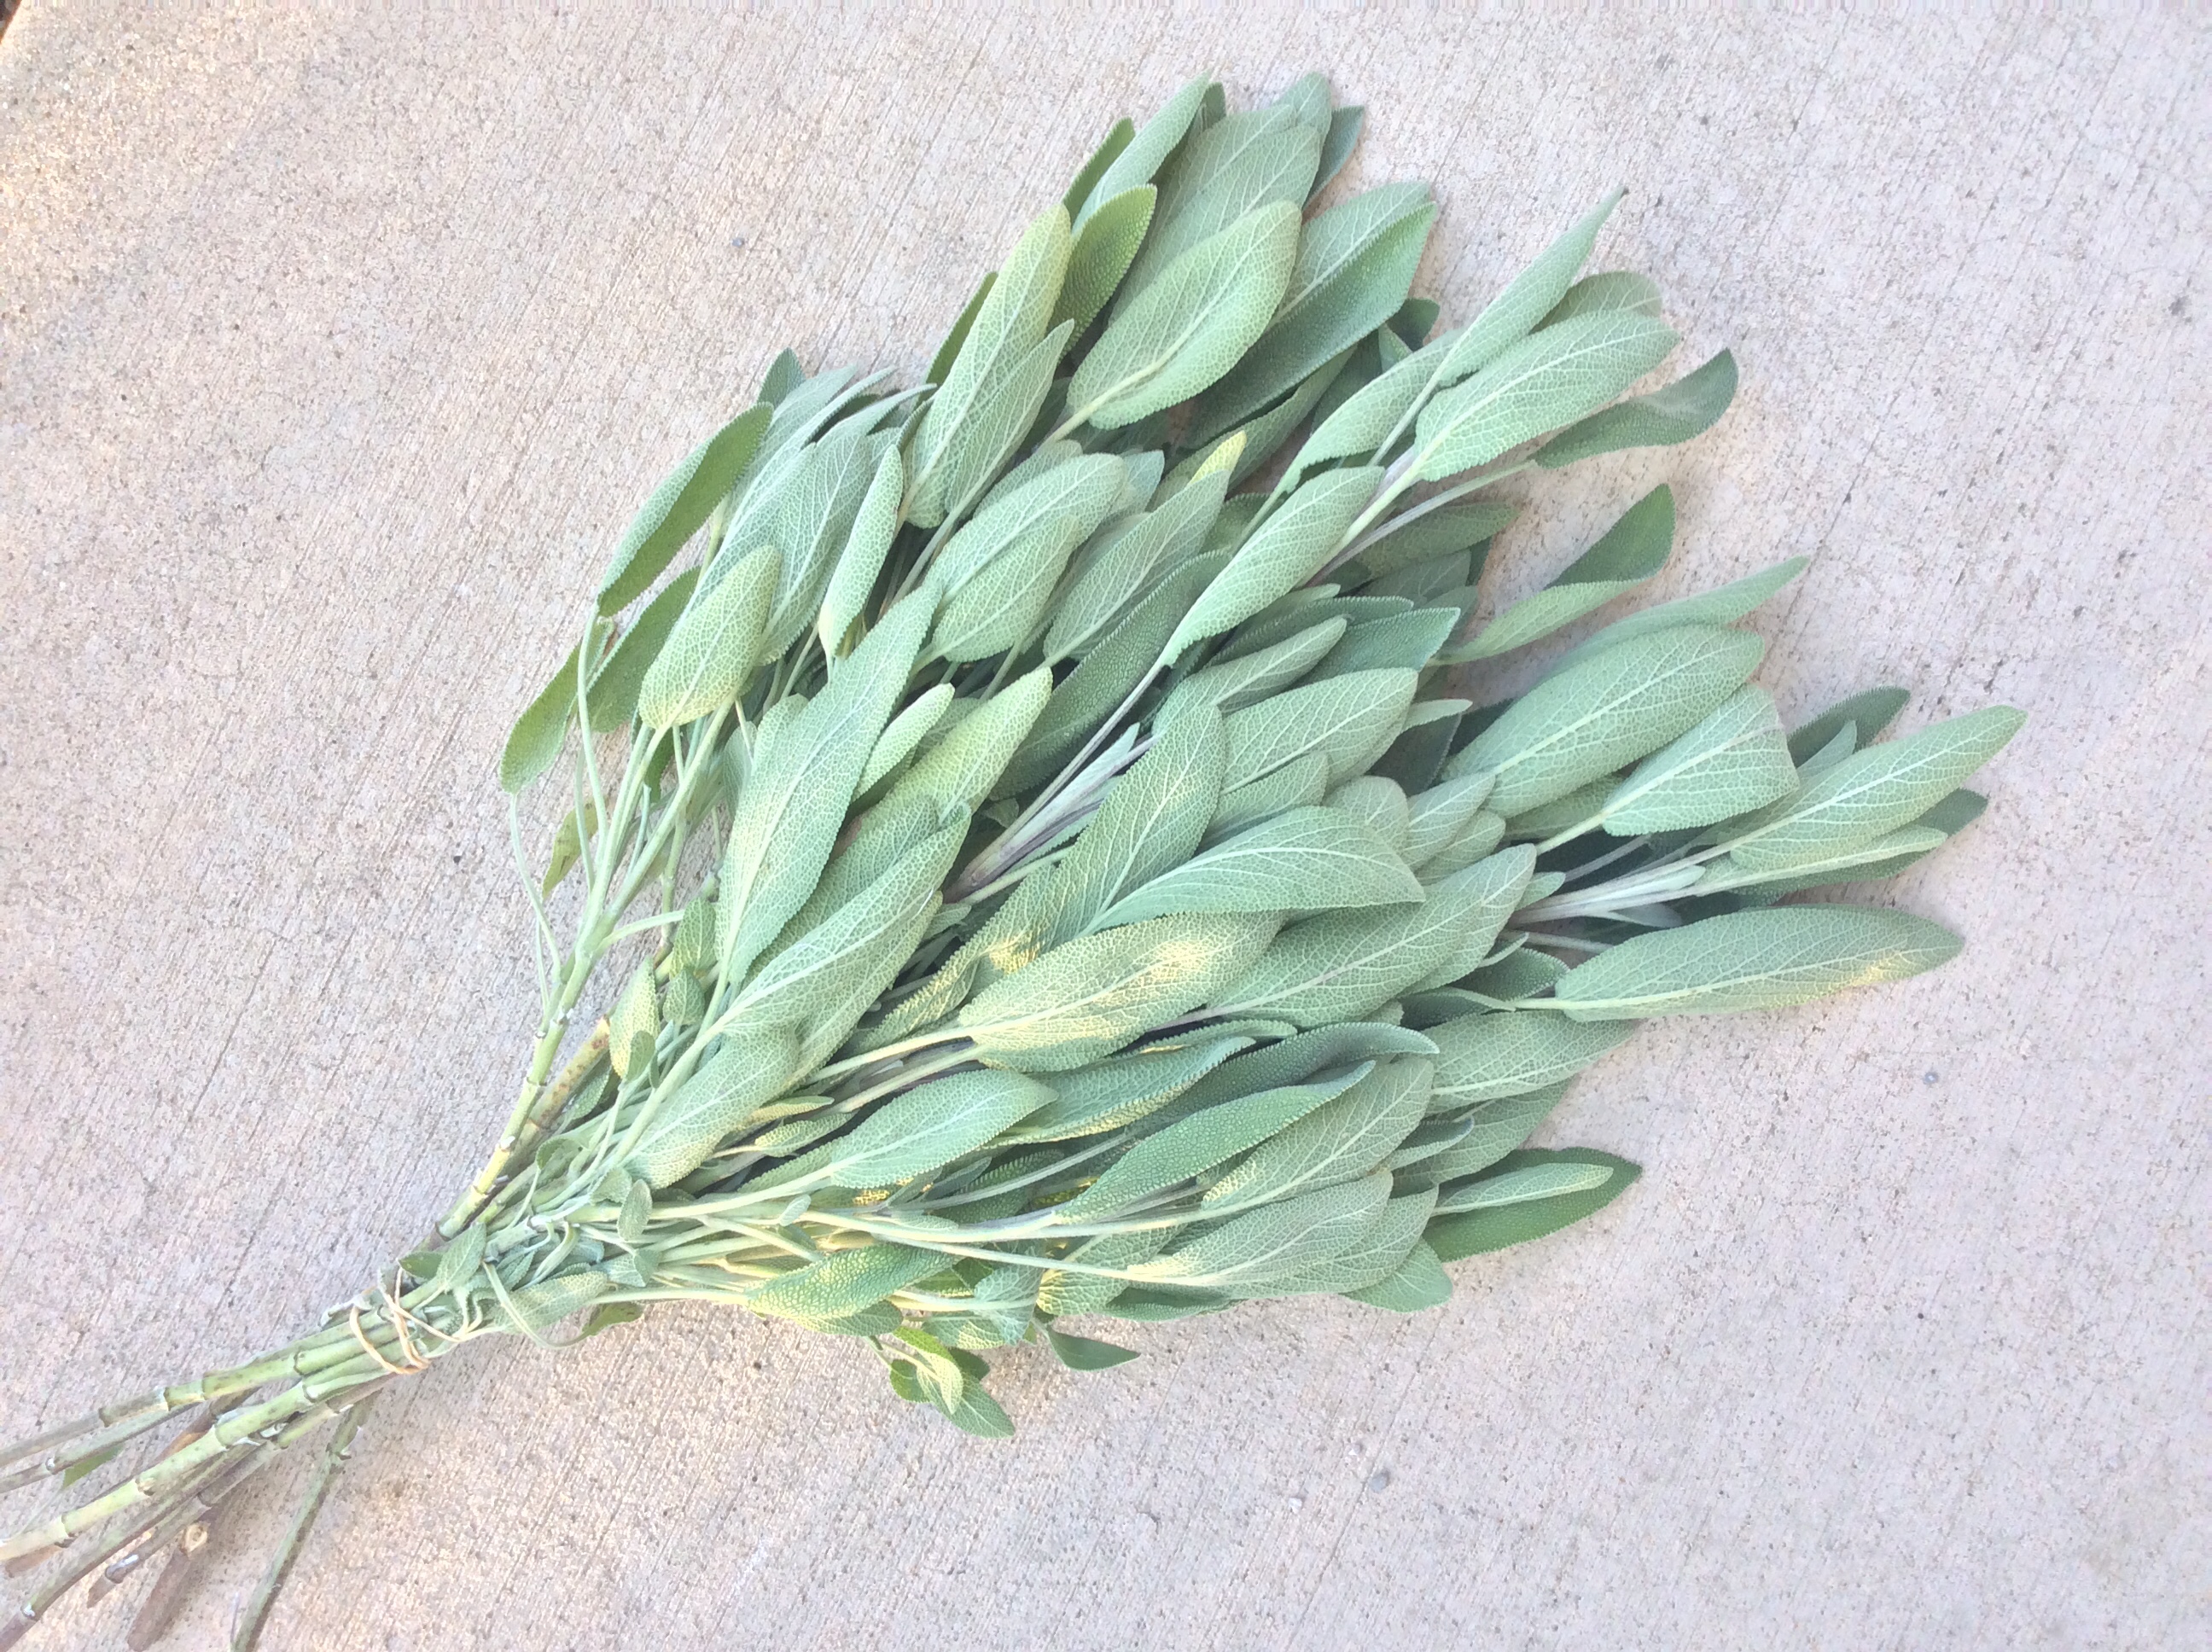
Harvesting Sage for Dried Herb Bouquets Part I.

In this short tutorial, learn how and where to cut stems for making herb bundles and bouquets for drying, that you can later use this winter in the kitchen! Sage leaves can be used fresh or dried in the kitchen, and add a lovely savory flavor to roasted chicken, pork chops, and sausage.
Dried sage can be a beautiful addition to dried herb bouquets, and…to correct myself, from what I stated in the video, it could also be used in fresh bouquets, as long as the lower leaves are removed from the parts of the stem that will be under water in the vase.

How to Root Coleus
Ahhhh, the Coleus….with it’s beautiful, vibrant color combinations, and intricately shaped leaf edgings, it’s no wonder we all wish they could last forever!
If you live in an area that freezes, you know that your coleus plants will not likely make it through the winter outside. One way to preserve them, would be to build a greenhouse, and heat it all winter, to maintain the tropical climate, that Coleus Plants love.
Not many of us have that kind of cash laying around, so another way to enjoy Coleus a little longer, is to take cuttings and root them. Coleus stems make beautiful, long lasting accents to end of summer bouquets. As an added bonus, if you change the water in the vase once or twice a week, you might even get your Coleus stems to take root!
Down below, is a video demonstration that shows where to cut the stems, and what to do with them to get them to take root! Hope you enjoy!


How to Root Curly Willow Branches in Water and When to Plant them in Soil
Advertisements
In May of 2018, my mom and I hosted our 4th #diggingfordiabetes plant sale to raise money for Type 1 Diabetes research. The sale was a success, and curly willow branches were one of our biggest sellers!
Mom and I divide up perennials from our gardens for the sale, with 100% of the proceeds going to JDRF. This normally works really well, but this year, spring seemed to take FOR….EEEEEVER to, well, spring! With a looming deadline of May 3 to have all of our plants ready to sell, we were really sweating it.
So this year, my husband, the other horticulturist in the family, helped me prune back our two curly willow trees, and I saved some of the curliest branches, bundled them, and put them in a bucket of water. I posted the pictures on Facebook for the plant sale, and had a lot of interest! I was so thankful, as my perennials were taking their time emerging, and were not as sales worthy as they were for past plant sales.
DIY NOTES: If you’d like to try cutting some curly willow branches yourself for rooting, here are a few tips!
- If branches are too big to cut with your HAND PRUNERS , the branches are probably too thick for rooting.
- I try to shoot for no thicker than my pointer finger.
- My favorite hand pruners are Felco # 2 (for right handers) and Felco # 9 for (lefties like me) I have had the same pair for 21 years! (please note that I am an Amazon Affiliate and I earn a small commission from any purchases made from the above links…thanks for supporting my site through your purchases!)
- I also recently purchased a Corona Root & All Purpose Saw, that will be great for sawing smaller branches that are in tight spaces. This saw is able to cut on the push and pull stroke, so I’m looking forward to trying it out!
It’s been about 5 weeks since I cut those branches. I saved some for myself, just to play around with, and make sure that they do root well. They did root, and finally, last Memorial Weekend, I was able to shoot this video and plant the branches in one of my favorite terra- cotta containers on my front porch.
If you purchased some branches from us at the plant sale, I hope you had good luck getting yours to root!
By now, they should be ready to plant in some soil. To plant them without damaging their delicate new roots:
- Suspend the branches in the middle of the pot, not quite touching the bottom.
- Then pour potting soil in with your free hand, gently filling in around the roots.
- Once the container is filled with soil, gently apply pressure to firm the soil around the branches so they are well supported and won’t fall over in the pot.
- You can plant the branches as deep as you need to in order to get them to stand up securely, as they will eventually root any place that has surface contact with the soil.
- Water in the branches thoroughly, and maintain even moisture for a week or so, until the branches are adjusted to their new home.
- Once they are acclimated to the pot, just water it to keep the soil evenly moist, or whenever you water your other annual flower containers.
- These branches can over winter in their container if you keep the container in the garage or a protected area outside. My mom had some that were left out in a small courtyard all winter 2017/18….a very cold one…..and they still survived!
- Side note: If you choose to plant them in the ground be sure to give them enough space to grow into a big tree! They grow very quickly…to maturity in less than 10 years. Mine are about 25 feet tall with multiple branches that spread about 15 feet.
- When they get older, they are known to drop lots of little branches, so it’s best to thin them out each year by removing 2 -5 of the larger branches.
Advertisements
How to Prepare Soil For Your Garden and Why You Should Do It
Advertisements
Why Good Soil is Key in Protecting Your Investment:
If you don’t have good soil, you might as well just throw your money out the window and watch it blow away. Plants living in good soil with lots of organic matter and good drainage will grow twice as big as plants planted in clay, or backfill from when the builders built your home.
If you don’t have good soil, you might as well just throw your money out the window and watch it blow away. Plants living in good soil with lots of organic matter and good drainage will grow twice as big as plants planted in clay, or backfill from when the builders built your home.
3 Ways to Make Healthy Garden Soil for Healthy Plants
- Add Compost: If you have poor soil that is hard, or sandy, or clay like, and poorly drained amend the soil with about 4 inches or more of composted compost (the black compost) or topsoil, and then till it in down to 6 or 8 inches deep. Why? Compost is filled with nutrients your plants need to grow big and strong and to have lots of blooms. Not only is it nutrient rich, but it also makes your soil more spongy to hold more moisture after a rain.
- Add Epsom Salts: Epsom salt has Magnesium in it in the form of Magnesium Sulfate. Why Apply? Magnesium is one of the main parts of the chlorophyll molecule, which is what makes plants green. Apply to the soil about once a month, as if you were lightly salting a steak, and you will have nice green plants.
- Add Turfus: Turfus is a product that can be added to the soil to help break it up and improve drainage. It looks like pea sized or smaller chips of rock. Contact your local garden center or home center to find it. Why do we need good drainage? Because most plants do not like to have wet feet all the time. Soil that stays constantly soaking wet or standing in water will cause plant roots to suffocate, resulting in poor plant health, disease, and eventually, death.
Advertisements
Lilacs: How and When to Prune

My public service announcement for today is: “Now is the time for all good men and women to come to the aid of their lilacs and trim, shear, thin, and prune them. ” Always prune your lilacs, if they need it, right after they bloom, because if you wait too long after they bloom, you will be removing next years buds.

So if it needs it, do it now! It’s also a good idea to remove a few of the really old branches from within the center of the plant. Below is a link to an article by Fine Gardening Magazine on how and when to prune your lilacs. How to Prune Lilacs by Fine Gardening Magazine I prefer to use bypass pruners for this kind of pruning job. This allows me to be more precise with my cuts, so that my lilac will look more natural, rather than sheared.

2 Best Organic Fertilizers to Get a Greener Lawn
Here’s another free gardening tip for the month of April or in the fall! Want to have the greenest lawn on the block? Here’s how:
- Find a pickup truck.
- Find your local compost facility
- Order up a truckload of compost
- Haul it back home and spread it evenly over your yard, about a 1/2 inch thick layer over the lawn.
- Rake it in.
- Enjoy all the compliments you’ll be getting over the next few weeks as your neighbors oo and ahhh over how lush your grass looks!
- This is great to do once a year or every couple of years.
- Why does it work? It supplements your lawn with much needed organic matter and nutrients.
- WARNING: You might have to mow a lot more often!
If you’d rather not deal with the compost method, milorganite is a natural alternative. Milorganite releases nitrogen slowly to your lawn and ornamentals in a form readily available to plants. There is no need to water it in either! What is Milorganite?
- Purchase a bag of pelletized milorganite from your local garden center or home center.
- Put it in your fertilizer spreader, and set it according to the instructions on the bag.
- Apply on lawn and in your flower beds
- It’s a nice slow releasing fertilizer.
- Apply once in the spring and fall.
I am not claiming to be any kind of lawn expert by any means, but I have seen the difference first hand in our own lawn since my husband has begun doing this. My brothers also have used the compost application method, and have had the same success. That’s it for today! Happy gardening, and mowing! Have you broken down yet and got out the mower, or are you at a standoff with your neighbor to see who mows first?
Boneless Beef Short Ribs, Italian Style
Boneless Beef Short Ribs, Italian Style © Marie Stephens 2015
Preheat oven to 500 degrees F
Ingredients
The Rub
- 1Tbsp balsamic vinegar
- 2Tbsp olive oil
- 1tsp granulated onion or onion powder
- 1 tsp granulated garlic
- 1 tsp kosher salt 1tsp dried basil
- 1/2 tsp ground oregano
Wisk ingredients together and rub all over meat.
NOTE: Works best if you wisk dry ingredients together first, then add wet ingredients and wisk again to avoid lumps of spices.
- Meat: 3 to 4 lbs of Boneless Beef Short Ribs from Fareway or your favorite butcher. Only about $4.99/lb, and tastes delicious, like a flat iron steak but in roast form.
Directions:
This recipe is for 3 to 3.5 lbs of meat.
- Preheat oven to 500.
- Put meat in a foil lined baking dish, I use a ceramic roasting pan…a deep one.
- Arrange the ribs side by side, standing on the skinny side, and nestle in the pan as close together as you can. I put the fat side facing up so it can baste the meat as it cooks.
- After you mixed all the spices and oil and vinegar, rub it evenly all over the meat on all sides.
- If you want the flavor to go down into the meat, you can pierce the meat on top but don’t go all the way through.
- Put the meat in the oven at 500 for about 15 minutes,
- then turn down the heat to 325. Cook for half hour, then baste with the juices, then another half hour, baste, then maybe 20 or 30 more minutes until it reaches your desired level of done ness.
- You can either just use the juice as is for an au jus sauce to dip meat in, or make gravy to go w/ mashed potatoes.
Gravy:
- 1 cup drippings
- 1 cup water, mix those together
- Then put 1/4cup flower with 1/2 cup cold water in a container that seals, then shake or wisk
- add to the drippings and water and wisk constantly until boiling
- then turn down heat a bit and keep stirring until it thickens.
I use the Betty Crocker Recipe for my mashed potatoes, and use the gigantic individually sold potatoes, because they are much faster and easier to peel. 4 large potatoes makes enough for our family of 4 and we still have a few leftovers. I usually roast carrots and other veggies in a separate dish, so they don’t get too soggy or too much fat from the beef on them. Usually roast about 10 whole carrots in the oven too. Let me know if you have any other questions. NOTE: If you want the meat super evenly cooked, it’s a little extra work, but you can cook it for 7-10 minutes at 500 and the flip it over and do another 7 minutes or so, but it’s a lot of work and sometimes you burn yourself doing it! It’s kind of hard to do with the beef ribs vs. a whole roast.
My Oh My, Purple Potatoes?
This is an update with a recipe for mashed purple potatoes that I tried growing this season. They are deeeelicious!

The Zone 4 and 5 Gardener’s To Do List for August/September
The Zone 4 and 5 Gardener’s To Do List for August/September
As you are about to see, late August/September is all about cutting back.
1. Remove Dead Flower Stalks from Perennials As Daylilies and Irises begin to die back, you can yank out the brown flower stalks, just give them a tug and they should pop right out.
2. Daylilies and Irises: Remove dead and dying leaves with brown tips. With both, you can just grab the leaves at the base of the plant and give a downward and outward tug, and they will come right off. If it’s the end of August, and you can’t stand the way they look anymore, you can remove all or most of the leaves, as these plants are beginning their dormancy anyway. I just removed all the leaves from some of my day lilies 2 weeks ago, Aug 18, and they are starting to get a few new leaves, and looking much happier.
3. Deadhead, Deadhead, Deadhead: Deadheading is the term used for removing spent flowers from your plants. If you have not been doing it all summer, it’s not too late to start. Just cut off the spent flowers just above a set of leaves, or down to a set of leaves where it will make the plant have a nice shape. Why deadhead? This will cause the plant to spend less energy making seeds, and more energy on producing more flowers. We could always use more flowers, right?
4. Peonies: If your peony bushes are covered with white powdery mildew, now would be an okay time to cut all the leaves off to the ground. I do this every year, and my peony bush thrives every season. Spare yourself from having to look at those icky leaves and just cut them down, right at ground level.
5. Hydrangeas: You can begin pruning back the blooms as they die back, or thin them out so that they don’t sag so much after a rain. My Limelight Hydrangea was so top heavy with blooms, that the last time it rained, it looked like someone had jumped the fence and landed right on top of the bush! After they dried off, I thinned out the largest blooms, and the whole bush, sprung back up, as if saying “Thanks, momma, my branches were getting so tired.” If you like to dry your Hydrangeas, wait until the florets begin to feel papery, and then cut them, and place the stems in buckets of water in your garage until they are completely dry. They make lovely wreaths and floral arrangements. If you are wanting to reshape your Hydrangea bushes, now is the time to do it, after they bloom. Pruning it in the spring will result in no flowers the next summer.
6. Asiatic and Oriental Lilies: If you haven’t already done so, you can cut back the stems to about 1/2 or 1/3 their original height to remove the seed heads where the flowers once were. As the stalks begin to brown all the way down…later in September, you can cut them back.
7. Purple Coneflowers: Remove the spent flower stalks, if you don’t like the looks of them. You might get a few more blooms, but at a much slower rate of growth as the season is winding down. If you don’t mind the looks of the seed heads, leave them on, as Goldfinches love to snack on them. Also, they will reseed and your coneflower patch will expand for next season.
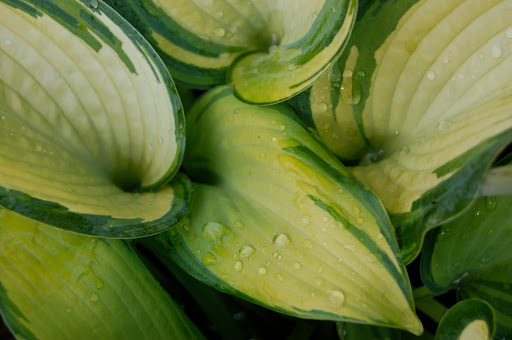
8. Hostas: Remove leaves as they turn brown or start to look bad, and cut spent flower stalks down to the base of the plant.
9. Are you beginning to see a pattern here? This time of year is all about thinning out and cutting back whatever is driving you insane because it’s so over grown. Grab those pruners and a bucket, put a tarp in the bed of your pickup, and start filling it up with everything that is beginning to make you want to pull out your own hair. Just remember, your garden might look a little “shocked” at first when you step back to take a look. Don’t worry, garden pruning is just like haircuts for plants. As my father-in-law always says, “The difference between a good one and a bad one is about 2 weeks.” It will be fine, and you will feel much more under control…..and maybe a bit sweaty.

The Sound of Silence

I took this photo while procrastinating during my days as a flower farmer so long ago. The work was hard, but the views, the sounds of nature, and the scents of the field were intoxicating. I will never regret taking time to soak it all in and just enjoy the fruits of mine and my family’s labor.
The Sound of Silence
does not exist to me, but this photo, taken several years ago, reminds me of the times when I was about as close as I would ever be, to experiencing complete silence.
This field, though far from the bustling sounds of any city, at least a half a mile away from any other neighbor, and nestled in one of the most beautiful countrysides west of the Mississippi River, was anything but quiet.
Mother Nature’s Super Expressway
I spent countless hours right along side Mother Nature out in this space. Picking flowers in what passers by might perceive as solitude, but I was never alone, and it was never quiet. Instead of hearing cars whizzing by on the Edens Expressway in the suburbs north of Chicago, where we had previously lived, I was now accustomed to the sounds of another form of traffic. Nature. Bees, flies, dragonflies, humming birds, and every other kind of bug and bird that calls an Iowa field home, were constantly buzzing by like speeders on the expressway. If I wore bright orange, or if my husband drank out of a bright orange cup, we had to be wary of hummingbirds that might mistake us for a giant flower and attempt to steal nectar from our ears! Every morning, I battled with barn swallows who tried to attack me as I attempted to open the door to my old flower shop. To them, I was an intruder, as they had made their nest directly above the door. Sounds of tiny wings swooping down with bat like speed so close to me, I could have reached out and grabbed them.
Bees that never stopped working…except for this
The birds were noisy, but they always seemed to take a break from their busy schedules every now and then. The bees, on the other hand, were workaholics. Never did they stop buzzing from flower to flower, working tirelessly, never taking a break, except for when the sun decided to hide sheepishly behind the clouds.
It never failed, no matter how busy those bees were, the minute, the second, the sun hid itself, all work came to an end, and silence wrapped it’s cloak around me.
Just One Bite?
Stop to find the forgotten few
beneath the weeds like hidden jewels.
Red, rose, yellow and green
The most luscious fruits I’ve ever seen.
They look glorious and plump from above.
Fresh tomatoes I do so love.
Stop to gather all the loot
bend down and look to find the shoot
From which to gently pry away
My delectable prize for the day.
Getting closer, drawing near
Whiteflies fluttering around my ears.
I’m so close, I can nearly taste it
That beautiful tomato must not be wasted.
The hunt is over,
I’m ready to strike.
Pruners at the ready,
Grocery bag at my side.
Stop for a moment.
Remember the story
of all it took
to go from seed, to sprout, to flower, to fruit.
So take one last look and remember the story
while you stare at this fruit in all it’s glory.
Mental picture taken.
Pride has been gathered.
There’s no mistakin’
This plant looks quite tattered.
But dammit, we started this thing from a seed
and we got it to make fruit and that fruit is for me!
Enough messing around,
Enough has been spoken,
Pick that mater before it gets broken!
Holy canoli,
You’ve…GOT…TO…BE…JOKIN!
Blood is rising
up into my face.
I cannot believe this big disgrace!
I pluck the fruit from the vine
only to feel as if I’ve been slimed.
My beauty,
my treasure,
my precious jewel,
Has been bitten, one bite
that could not be viewed.
But certainly felt
the juices running and streaming.
Face has gone red and now I am screaming
For the love of Pete! And a choice other few
Why is it that you have to do
this horrible, terrible, awful thing,
to my tomato
my pride,
my reason to sing?
For the love of Pete! And a choice other few,
Just eat the whole thing,
Is that so hard to do?
If you’d have left no evidence
for me to find,
I would not feel the urge to shoot your behind!
So get that hiney back over here.
Finish your tomato, you stupid deer!
Or Raccoon,
Or squirrel
Whatever you are.
Finish your tomato
or I’ll hunt you with my car!
Now tossing tomatoes
up over the fence.
One, two, three……Ten
My pride has gone humble
my anger subsided.
If they think they have won,
they are misguided.
Critters score one.
But I will not crumble.
There will be a next time,
But I will not fumble.
I WILL get there first,
to the treasure site.
I WILL find the loot.
I WILL take the first bite.
And one other thing…..
I will actually finish my fruit.
Original Poetry by Marie Stephens Copyright 2013

Iris and Daylilies: Are They Dying?
 It’s August. It’s Iowa. It’s hotter than a monkey’s pattoot. Why do my Iris and Daylilies look like crap?
Yes, we are in a bit of a drought right now, but even though you are watering, your Iris and Daylilies still might look a little worn out….and you know what? That is okay. Stop worrying, cuz every little thing is gonna be all right.
- While Irises and Daylilies give us great blooms in May and June, they too, have a life cycle.
- You don’t look perfect all the time, and neither do Irises and Daylilies….and that’s ok!
- This is normal. At this time of year, these plants start going dormant, so they will start slowly having their leaves dry up.
- All you need to do is grab the yucky leaves, and with a downward and out tug, pull them off of the plant.
- Voila, your plant just got a facelift, and all is right again.
- Remove the leaves as they appear, and your garden will look more fixy, and manicured.
- If you don’t remove them, it won’t hurt the plant, it will just not look as pretty.
- Yesterday morning, I spent about 10 minutes yanking dead leaves off my Iris and Daylily plants, and it made a huge difference in how my front flower bed looked. Now it’s not tired and saggy, like me in the morning. It got a face lift, and it looks much better….now I need to do that for the rest of the collection.

I Garden Because I Can….Pun Intended
This post is about gardening, and why I love it, why I hate it, and why gardening will always be a part of my life!


This is what they look like after being tossed in olive oil. Shiny!


This was a sampling of tomatoes from my garden a few years ago.


I garden because I can!
There’s no place I’d rather be.
In this place, treasures abound,
when searching around,
hunting on bended knee.
My arms are getting itchy,
The bugs are beginning to bite!
Yet still,
I feel,
A calm respite.
My buns are sweating,
My back is breaking,
SO MANY TOMATOES,
I should be staking!
Muscles I never knew I had,
soon will be aching!
Weeds are tall,
My patience is shrinking!
My boobs are sweating!
My armpits are stinking!
And then I start thinking:
How I would love to fall into a pool
But then I look at my haul,
and I begin to drool!
My shirt is stained
My body is drained
My thirst needs quenched
My clothes are drenched
But…
My mind is clear
My soul is cheered
My heart is full
along with my bucket!
My bucket is full
of gardeners’ loot.
I’ve hit the jackpot
in multiple pounds of delicious fruit!
My garden may not be perfect,
after all, it’s full of weeds,
but still it remains
an escape for me.
Not to be alone,
but to live in community
with birds and bees…….
and those stinking rabbits,
the snakes that give me the shivers,
the caterpillars,
other creepy critters
and let’s not forget the coons!
Yes they have a right to be here too,
so I guess I could spare them a tomato or two.
©Marie Stephens 2018
Are You Ready?
If after reading this poem, which is almost a disclaimer stating that gardening is not glam, you still want to give it a try this year, then I found a collection of seed at a decent price to get you started! I read a little bit about the company, and it warmed my heart! Take a peek and see for yourself when you click the pic!

The “I Garden Because I Can” Gift Collection, by Marie Stephens Art
Below, is a link to a small collection of “I Garden Because I Can” items that I created as gifts for gardeners and home grown food preservation fanatics! They can all be personalized and shipped directly to you or to the person you’d like to send the gift to!
So far, I have designed a
- kitchen floor mat with funny canning puns and phrases,
- a tshirt that can be ordered in multiple styles and colors,
- an apron,
- a bandana to hold your hair back on canning day,
- and a mason jar mug with the graphics I designed to make your fellow gardener/canner smile, especially if they hate bunnies…even though they really are so cute!
I hope you will get a chuckle, and if you do order something, thanks so very much! I earn a royalty for the items purchased with my art on them!


Topiary Lounge Furniture : How I Up-Cycled an Old Victorian Love Seat into a Living Garden Sculpture Using the Best Perennial Groundcover Plants in the Midwest
Advertisements
The Tale of the Living Love Seat
By Marie Stephens
It was March of 2012 and I had some time on my hands, or so I thought…

This was me and my old velvet love seat in 2012. The love seat was purchased in
1994 by my first college roomie and me, before we moved into the dorms at Iowa State University. It was the coolest couch on the 4th floor, and I loved every fiber of it! It wasn’t the most comfortable piece of furniture, but it looked awesome! Everyone on our floor loved it. In fact, somebody once tried to steal it from us and we had to go back and reclaim what was rightfully ours! As old as it was, I could never part with it, because I loved it! Unfortunately, my cat had other ideas. He thought this lovely piece would make a nice litter box. I tried to clean it, but was never able to get the cat aroma out of it.
The time had come to make a decision, either get rid of the beloved love seat, or do the one big thing that had been on my horticultural bucket list for the past 10 years..Turn the love seat into a live Topiary sculpture. I was up to the challenge. After all, how hard could it be? I had a 16 month old baby, and a first grader. I needed something to do in between naps, diaper changes, school pick ups and drop offs anyway right? So why not?
I wasn’t new to topiary.
I studied horticulture in college, and had the opportunity to work as an intern at Longwood Gardens in Pennsylvania, one of the most amazing public gardens in the United States. I spent 6 months there, and learned quite a bit about how to prune, and maintain topiary. After graduating with a B.S. in Horticulture from Iowa State University, I spent 2 years working with topiary as a horticulturist at Chicago Botanic Garden. I guess what I am trying to say, is that this whole, living couch thing, didn’t just happen on a whim. I had plenty of time to think about it, and practice on other sculptures, learning what might or might not work for this project!
So, yep, I did it. And I still can’t believe it.
I created a living sculpture for my garden from this old victorian love seat. In all, it took me about a month before it was ready to set out in the garden, and about 2 or more months for the cuttings to get established and start to green up and grow. Lots of pinning, sewing, pinching, and watering went into this neighborhood landmark.
Advertisements


Advertisements
Wanna know how to give your couch a hair cut?
 what is the Best Way to Trim Sedum
 ?
?

This has been my weapon of choice for tackling the job of trimming my topiary couch for the last 6 years. It was a Mothers Day gift to me from my husband, Tim, also a horticulturist, and my two boys. They know me so well! It sure beat having to pinch all of those sedum tips by hand! Although, my youngest son sure enjoyed pinching the tips and seeing how high he could throw them at the window behind the couch! Ahhhh…..memories.

What is the best way to weave fishing line throughout your topiary?
If you want to be able to attach the wildlife netting to the couch, you need a heavy duty needle. Luckily, I found one of my mom’s old upholstery needles from an old sewing kit. It was essential in shaping the netting around the couch to duplicate the victorian look. Had I not done this, the couch would have looked much more like a big blob!

Fishing line is your friend when it comes to topiary. It is see through, so it is invisible, which makes your project look nicer, especially in the beginning stages when all your little cuttings are just getting started. The only thing you have to worry about, if it’s a long term project meant to last for multiple seasons, is that any fishing line exposed to direct sunlight, can break down over time and lose strength.

So this is what I mean by wildlife netting. It comes in a seven feet by 100 feet long roll. It was the perfect width for my love seat. Easy to cut into pieces for smaller projects too! If you click the link, you will see there are many brands at different prices…I just chose this one because it had the best picture to explain what it looks like.


So to the right, you see a giant straw colored blobby bale?This is long fibered sphagnum moss. It is the key ingredient for most topiary projects. I used a bale this size, 22 lbs, to cover my couch with a 4 inch thick layer of it. It has the ability to soak up a hunormous amount of water, which makes it ideal for getting plant cuttings established…like a few pounds of sedum spread out over a couch!

This glob of silver shiny stuff is a glob of what we topiary folks call greening pins. I used them to place cuttings in the vertical sections of the couch. I could only sew in so much of the netting with the fishing line, so this is what I use in between! I would lay the sedum cutting horizontally underneath the wildlife netting, and then carefully pin it in place with one of these. Using the pins helped the cutting to maintain contact with the moss…essential for getting roots started. Once the topiary got to growing, I was able to lay cuttings over the top of the netting, and use these pins to hold them in place too.
It’s now 2017, and I have a problem…
The living love seat has survived 6 harsh Iowa winters. It’s about to go through it’s 7th, but there is a bit of a problem. Some how, during the last month of dry weather, I think that some honey bees have decided to set up shop in the back side of the love seat! I found out the hard way one afternoon, as I was giving the couch a shower. A swarm of about 100 bees started coming from behind the couch! I quickly ran away, and stopped watering. Even though I was super careful, I still ended up getting stung by one that snuck in on my clothing. Ouch!!!!!
What should I do?
Consider it a good ride, and call it the end of an era? Try to harvest some honey? I wonder if we would have some tasty honey as we have so many varieties of flowers in our garden. Spray the poor bees and keep the couch? Spray the bees and send the couch to the landfill? Just wait till a frost freezes out the bees and then decide?
Update: October 9, 2017
Holy cow, there is a honey thief among us! Something broke into the back side of my topiary couch to get to the honey! There is now a 10 inch diameter hole in the back side, and the remnants of a bee hive! Yikes! I feel sorry for whatever creature stirred up that bees’ nest. I am slightly jealous though, because I bet that honey was deeeeeeevine!

Top 3 Must Have Tools for the Home Gardener
- Felco Pruners are by far the best pruners I have ever had. They are Swiss made, and last forever! I have had the same pair of pruners last for 14 years. They have replaceable parts, so if one part wears out, you don’t have to buy a whole new pair of pruners. They are tough and sturdy and I don’t go anywhere without them…just ask my husband.
- Wilcox Pro Trowels are the nicest trowels on the market in my opinion. They are made from stainless steel from one solid piece from the tip of the blade all the way through the tip of the handle. Even in the hardest soil, you will have a tough time bending this handle. Also, they are made in the USA right here in my home state of Iowa.
- Garden Spade I prefer Ames brand. After many years of breaking my back and planting on my hands and knees, I have gone to using a spade more often than using a trowel to plant my annuals and perennials. You don’t have to bend as much, and you can still get a fairly precise hole dug out for smaller plants. Also, using a spade has reduced the amount of work I have to do with my hands and wrists.
Sedum: 10 Ways to Use It
- Ground covers
- Earth Sculptures
- Stuffed Topiary
- Containers
- Framed Outdoor Wall Art
- Rooftop Gardens
- Living Walls
- Living Wreaths
- Kissing Balls and Pomanders
- Table Centerpieces

Sedum Couch: This is a real couch that I stuffed and covered with sedum. It survived a zone 4 winter, and is still looking good for the 2nd season! My cat, Uno, was being a good sport by posing for me. Now that’s what I call a topiary.
Find Sedum Cuttings for your own projects

7 Reasons You Should Grow Microgreens

This is the book I bought to learn about how to grow microgreens, available on Amazon.
 Why the Sudden Interest in Microgreens?
A few years ago, when my boys were ages 2 and 7, I discovered microgreens. It had been a long winter, and I was aching to be outside. January and February are the months when my family gets a new seed catalog in the mail at least once a week! This may be from my last 17 years of mail ordering seeds and bulbs!
The first time I heard the term, microgreens, was at a “Grow Your Small Market Farm” class my husband Tim and I took at Iowa State University during our days as cut flower growers. I had no interest in microgreens at the time, because I was deeply invested in growing cut flowers. I was always curious about what they were and how to grow them, but never made the time to learn more, until that long, cold winter a few years ago.
I must have seen something about microgreens in one of our seed catalogs, and decided to learn more that winter. It was a fun project that I could do with my 2 year old in one arm, while planting seeds with the other hand, and hopefully, providing my kids a tiny learning experience at the same time

7 Reasons to Grow Your Own Microgreens
1. Microgreens taste great: They give your salads a kick in the pants by adding a little bit of spice but not too much. Radish microgreens, for example, have a kick, but are not nearly as strong as eating an actual radish. I would say they have about 1/3 or less of the spice of the actual full grown radish. The same principle holds true with other plants.
2. Microgreens are super easy to grow: Most of my favorite microgreen varieties will sprout from seed in 7 days or less.
3. Fun and Easy Project to do with the kids: Since the seeds germinate so quickly, and large quantities of seed are broadcasted over the seed tray, kids will enjoy it.
4. Microgreens are packed with nutrients.
5. Microgreens take very little space to grow.
6. Microgreens take very little supplies to grow.
7. Microgreens can be grown year round in your home.
Arugula
The picture below is what full grown arugula looks like. Arugula is a fun one for beginners, because the seeds sprout really quickly and easily. Arugula at this stage is very strong tasting, and sometimes, a little bit too intense in flavor, but if you just eat the little microgreen seedlings, the flavor is subtle, sophisticated, and delicious as a garnish, salad accent, or atop a beautiful panini, burger, or cold cut sandwich!
Arugula seed is really inexpensive, quick to germinate, and very rewarding in terms of flavor when harvested as a microgreen! Click the photo on the right, if you want to get some of your own seed to try.

Kale
Below is a packet of Dwarf Blue Curled Scotch Kale. It sprouts very quickly, so it’s really rewarding to plant these with kids! It’s packed with nutrients, because, well, it’s Kale! It can be harvested as a microgreen, or allowed to get a little bigger for baby salad greens. But let me tell you, even though it is Kale, it tastes so much milder when you harvest it when it’s only 2 or 3 inches tall with cute little baby leaves! I have waited until the leaves are about 1inch by 1inch, and then pinch them at the base of the stem without removing the center of the tiny plant, and gotten several cuttings throughout the summer this way. I suppose letting it get this big, probably makes it less of a microgreen and more of a baby salad green, but regardless, it’s a great addition to salads, and it also holds up in soups…think potato soup with Italian sausage.

To order Dwarf Blue Scotch Kale on Amazon, click the pic above!t
Radish
Radish seeds are super easy to sprout, and they will pop up in a week or less! And these little cuties are purple! Don’t let their cuteness fool you though; they pack a spicy punch in that tiny little seedling, making them perfect for spicing up your burgers and sandwiches! This variety is called Rambo.

Beets
Below are Bull’s Blood Beets! Quite a bit different from what we all normally think of when we think of beets. They are so fresh and colorful, and would be so beautiful and nutritious as a garnish to just about anything! Well, maybe not with cereal.

Mizuna
Japanese Mizuna is another easy to sprout seed that is packed with flavorful punch! Plant these little guys if you are a fan of the spicy mustard flavor of wasabi.


Re-used Take out food containers made the perfect mini greenhouse for growing microgreens! Just make sure to wash with soap before adding your germination potting mix.
The tray to the above is a tray of peas sprouting just 3 days after we planted them. The tray to the right is all Arugula about a week after we seeded them. The trays are re-used take out containers from a local restaurant. No drainage is required. I would recommend using a shallow container no more than 2 inches deep to prevent excess moisture and seed rot.
Soil?

We used regular Miracle Grow Seed Starting Soil.
Let’s Play in the Dirt!

We poured some soil in a 2 gallon bucket, brought it to the kitchen sink, and used the sprayer to wet it down. Potting mix takes a while to absorb water, so you get to squirt water on it a lot…bonus for my little guy. Then you get to stir it up with a big spoon until it is just right. Not sopping wet with water standing in it, but wet enough that if you picked up a handful, and squeezed it, you could form a ball.

How to Plant the Seeds
1. Once the soil was moist, we put it in our cleaned take out trays, pat it down a little bit, and then scratched the surface so it was rough and not totally smooth.
2.Then we took our seeds and scattered them just as if you would be sprinkling salt on a steak. About 1 seed every half centimeter or so. Not precise, just scatter and have fun!
3.After we spread the seeds, we scratched the soil a little bit again gave it a love pat, and covered up the tray with the clear lid. A perfect moist environment to get them going.
4. Once you get them planted, you can put the tray on top of the fridge, so they get some bottom heat, which speeds up sprouting(germination).
NOTE: If you keep the lid on your trays, you should not need to water them until after they have sprouted. I kept a mister on hand, and misted the seeds right after we gave them their love pat, and then left them alone.
How Do I Care for Microgreens Once They Sprout?

We checked our seedling trays daily for signs of life, and after about 3 days, the peas began to sprout.
KEEP THEM COOL AND BRIGHT!Once they all sprouted, I removed them from above the fridge and place them in a cool, yet sunny window, and away from heat vents. An ideal temperature average would be between 60-70 degrees F. once they sprout. Microgreens can also be grown in a cool place like your basement with fluorescent lights overhead.
How do I water them?
In order to not disturb the soil too much, I usually would turn the kitchen faucet on the lowest pressure possible, and directed the water along the side of the container to let it seep down to the bottom, so as to water the roots from the bottom up. I might have used about 1 cup or less of water per tray, let it soak up, and then poured the excess off by tipping the tray gently to one side. Not a lot of water is needed.
Once the lid is removed, it is important to maintain even soil moisture for your microgreens…but not have the sprouts sitting in water. If you think you put too much water in the tray, just gently tip it at an angle to allow the excess water to drain over the edge of the tray.
After about a week and a half, we had a crop. I just left them in the container, with the lid off, and snipped as needed to put in my salads or on sandwiches and burgers. The kids actually loved eating the pea shoots. Peas shoots are sweet, tender and delicious. They also make a beautiful garnish if you like things fancy.
That’s it on microgreens for now. I hope you learned something and that you’ll consider giving this fun little project a try! Stay warm!

If you look closely, you will notice that each type of seed sprouted at different times. This is one reason why I would rather purchase separate packets of seed types instead of a mix several kinds of plants.

When the seedlings are about an inch or so tall, with about 2 little leaves on them, you can begin cutting what you want to eat!

I like to label each type of plant and also mark the date that I planted the seeds, so I can keep track of when to expect them to start sprouting, and of course, remember what flavor to expect before I sample them! Popsicle sticks, or even plastic spoons could work. Pencil is the best utensil to write with.


